Server Settings | Password Settings | License | Authentication | Messages | Log | Server Environment
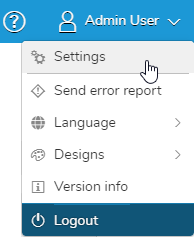
| As a user that is defined as an admin by the corresponding role, you can hit the settings button by clicking on your user profile name on the top right corner.
Within the settings panel, you can define several settings: Server, Password, License, Authentication, Messages, Log and Server Environment. In addition to the settings, you can also send an error report, change the language (German or English) or the design (light or dark) to set or unset the dark mode. You can also view the version info of your Simplifier instance or log out. |
 |
Server Settings
| The Server settings control your session. At the subtitle Authentication token, you can set the lifetime of the authentication token and its checking interval.
If you set the authentication token to active, the checking interval to 10 seconds and the maximum lifetime of the authentication token to 3600 seconds, that means that every 10 seconds it will be checked if you are inactive. If you are inactive for about 3600 seconds, you will be automatically logged out. |
 |
Define the email settings within the SMTP Settings.
 |
|
| SMTP Port | Specify the port of the outgoing mail server, e.g. 587 |
| Authentication required | If activated, a user/password authentication from the outgoing mail server is required |
| Encrypted with TLS | If activated, the transmission is encrypted by TLS |
| Sender E-Mail | Enter the sender’s email address, e.g. no-reply@simplifier.io |
| Sender | Specify the name of the sender to be displayed |
| Password | Set a secure password |
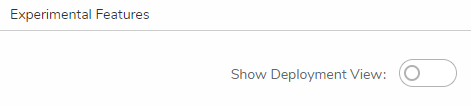
| You can switch on Experimental Features. It’s not guaranteed that these features work properly. |
 |
Please change the settings regarding the Artifact Graph only if the Simplifier support asks you to do so.
The Cluster Mode is explained here: Cluster Mode
Password Settings
The Password settings specify the password policy for the users.

| Minlength | Minlength defines the minimum length of a password. Set a high number for added security |
| Count lowercase characters | Defines the minimum count of lowercase characters in passwords, e.g. setting it to 4 means that a password has to be “abcdEFG” (at least four lowercase characters) |
| Count uppercase characters | Defines the minimum count of uppercase characters in passwords, e.g. setting it to 4 means that a password has to be “ABCDefg” (at least four uppercase characters) |
| Count numbers | Defines the minimum count of numbers in passwords, e.g. setting it to 4 means that a password has to be “1234abc” (at least four numerical characters) |
| Force symbols | This forces the user to use at least one symbol such as $%&# |
| Prohibit parts of the username | This option prohibits users from using their username or parts of it for their password, e.g. the user ‘John’ cannot use a password like ‘John123’ |
| Block user after specified number of failed attempts | Specify a limit for failing logins to prevent Brute Force Attacks. If the user exceeds the limit he will be blocked. To unlock the user, the admin has to do this via the user management or the user can reset his password to unlock himself |
| Demand captcha after specified number of failed attempts | This option demands a captcha after a specified number of failed attempts |
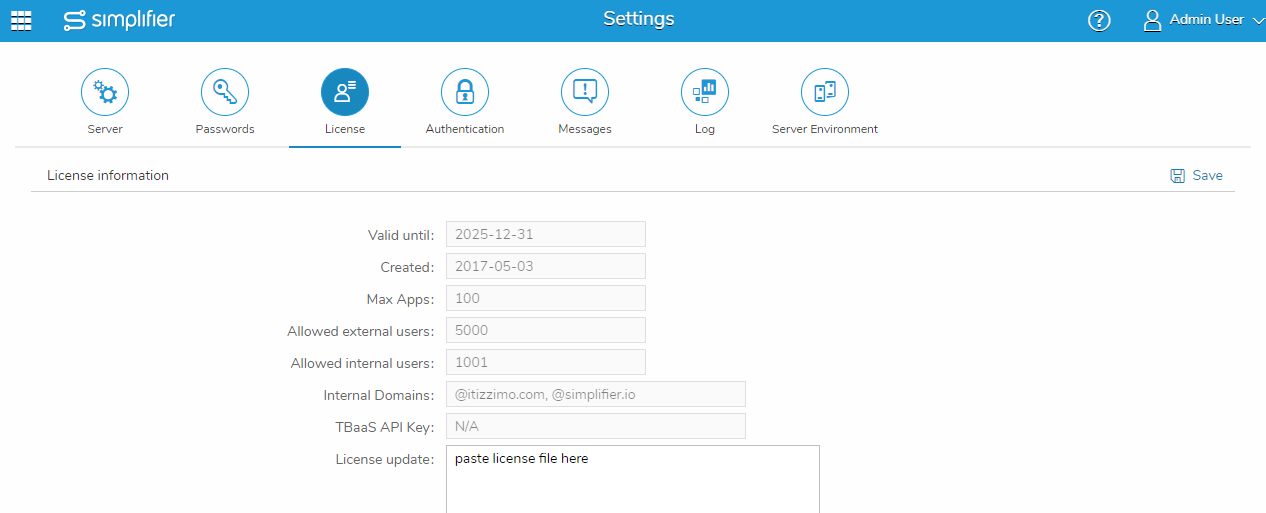
License
| The License settings offer information about the current license you use. If your license expires, you can update it here. Simply copy and paste the license key in the corresponding field. |
 |
Authentication
Take a look at Authentication Settings and the following subpages.
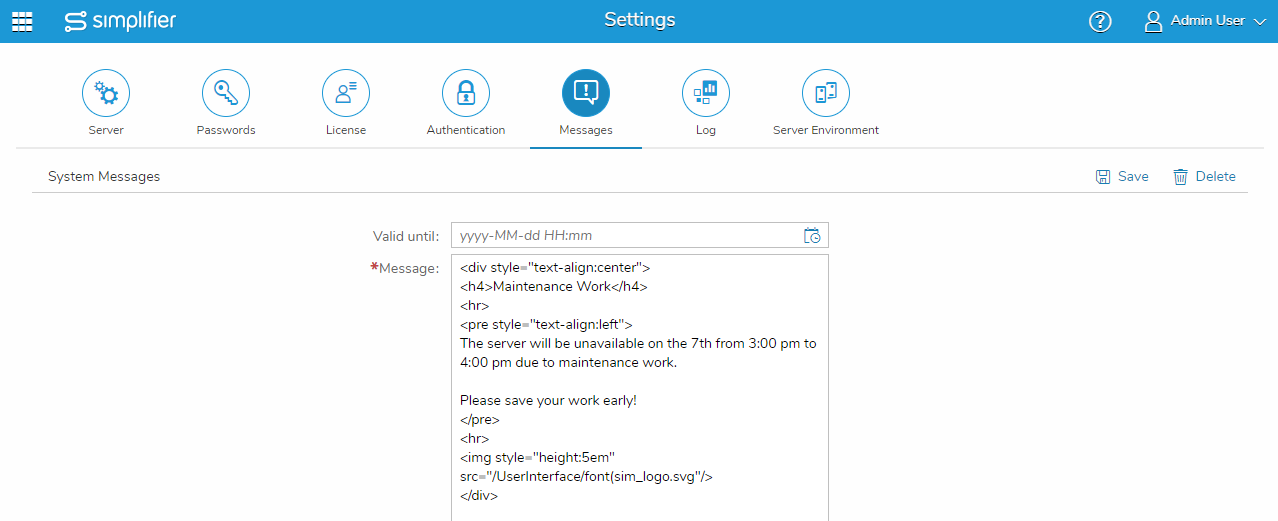
Messages
| The Message settings allow you to store system messages, which are transmitted to all logged-in users, e.g. if you want to inform them about maintenance work. With corresponding rights (assigned role “System Messages”), you can add a validity date. The messages can be written in HTML. As soon as a message is stored, it is pushed to all user. A user who logs in later receive the message as well. The message is displayed as an overlay and must be closed manually. |
 |
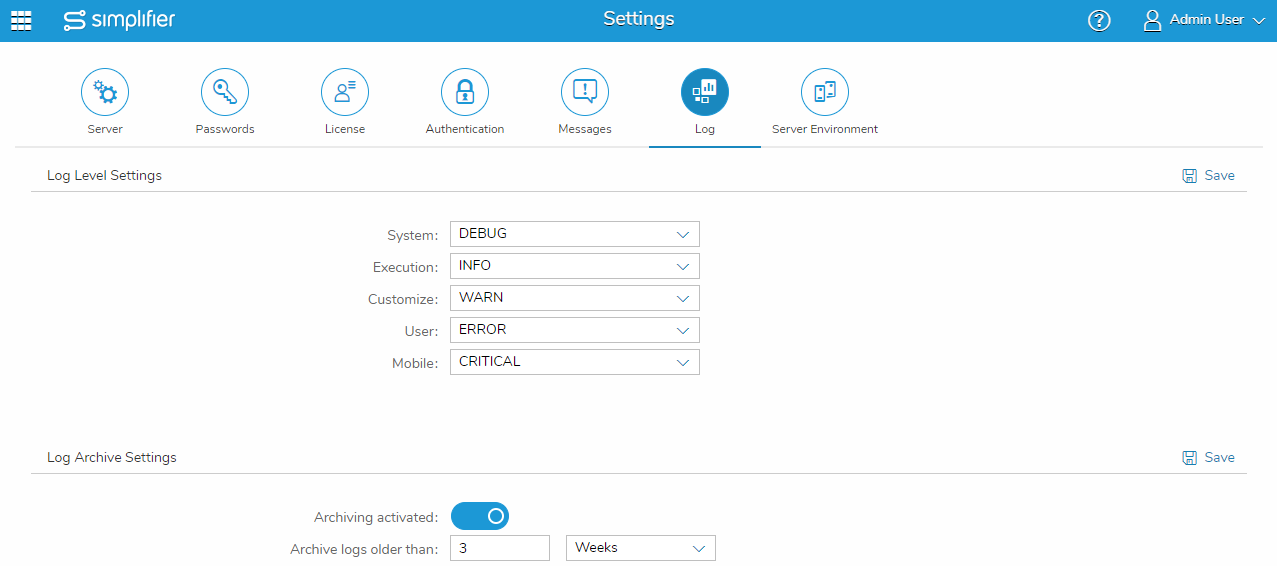
Log
| Within the settings, you find the settings for the logs. You can define per categories, which log level will write a log in the logs & Monitoring.
Choose from the following categories:
Use the Log Archive Settings to specify the time period for archiving the logs. It runs every day at 3 a. m. when it’s activated. |
 |
Server Environment
Take a look at Server Environment.